Soft Baked Frosted ‘Cream Cheese’ Sugar Cookies – No eggs, Dairy Free!
These ‘cream cheese’ sugar cookies are honestly the best sugar cookie you’re ever going to have. They are melt-in-your-mouth, richly tangy yet perfectly sweet, soft, “buttery” and oh so moist thanks to using powdered sugar instead of granulated sugar. We then frost with a dairy free cream cheese frosting for the perfect decorated cookie for all of your cookie baking needs! The best part- you don’t need any eggs nor dairy to make the dough. It’s entirely and secretly vegan!

Why you need to try this cream cheese sugar cookie recipe:
If you’ve been a long time reader, then you know that I’m a massive fan of all things sugar cookie.
From my classic sugar cookie cut-out recipe to my drop-style sprinkle sugar cookies, and even a sugar cookie dough cheesecake AND sugar cookie dough-stuffed cupcakes?! I mean, I’m obsessed.
So when I tell you that this is quite literally the sugar cookie recipe of all sugar cookie recipes…this is not something to take lightly.
These cream cheese sugar cookies (made with dairy free cream cheese!!) are it. They melt in your mouth, they’re soft and “buttery,” while being structured and easy to cut-out into whatever shapes you love!

The addition of the cream cheese into the cookie dough is what makes these cookies so special. It’s like adding cream cheese to a pound cake recipe (see my chocolate cream cheese pound cake 😉 ). Deliciously rich, moist, and with an ever so slight tang that complements and balances out the sweet better than any salt would.
Then we top with my easy and simple dairy free cream cheese frosting because while I do love a good royal icing, we just need cream cheese frosting on cream cheese sugar cookies. It only goes!!
How the heck is this recipe vegan?
I’m so glad you asked 🙂
Instead of butter: Simple! We’re using vegan butter 🙂 Now, a lot has been changing on the markets recently. As of when this recipe was created, I’m using Plant Crock and Violife. They yield a pretty decent flavor that works really well with this recipe. And they’re also both nut-free!
Instead of cream cheese: You guessed it- vegan cream cheese. I do have a homemade vegan cream cheese recipe that I really love here, but of course, that’s a bit more work. So store bought varieties I like are Tofutti and Kite Hill. I’m weary of Violife here, as it doesn’t work too well in other baked recipes (think cheesecakes and cheesecake-filled items). It could work here, but I haven’t tested it.
Instead of eggs: Dairy free yogurt 🙂 It’s pretty awesome how well it works. I usually like Forager Project cashew milk yogurt. Their Greek-style is phenomenal in cookie recipes, adding a really nice, buttery soft, tender texture to every baked good.

Key Tips when baking vegan cream cheese sugar cookies:
Now if you’ve ever made cookie dough before, this recipe is also really quite straightforward. The only main difference is adding in our dairy free and vegan swaps where you’d use more traditional ingredients.

But here are some key tips I recommend during this baking process:
CHILL the dough overnight: You’re going to reallyyyy dislike me for saying this, but in my testing rounds, I found this dough is best chilled overnight. I know, I know. You could get away with 4-6 hours, but honestly, best results in my test rounds were overnight.
The best part is that the dough comes together in 10 minutes, so it’s really minimal work the first day!


Use a generous sprinkle of flour when rolling: This dough remains quite soft even after chilled, so to prevent any sticking to your rolling pin, I recommend generously flouring your surface, the dough, and the rolling pin. Don’t worry- this won’t alter the flavor nor texture of these cookies.
It will just make it a much easier process to cut out the cream cheese sugar cookies and get them into the oven to bake!


Frost on cooled baked sugar cookies: This is super important. Like with baking cakes, if the cookie has any warmth to it whatsoever, the frosting will slide right off. Make sure your cookies are completely cool to the touch before you start to make the frosting!

Decorating tips:
One batch of frosting is enough to decorate an entire batch of cookies, including some finer piped details. But deciding how much of each color you need is a bit of an art, rather than a science.
Deciding the colors:
I recommend looking at the shapes you have (gingerbread houses, gingerbread shaped people, snowmen, snowflakes, mittens, etc.) and deciding which colors are most prominent in each cookie. Then decide the next set of most prominent colors, and finally the last tiny details.
For me, this looked like white, brown, and red for what I needed the most of, followed by black, green, and pink then finally, orange for just the tiny carrot noses on the snowmen!
I did about 3/4 cup of frosting for each the white, brown and red, since I would need those the most, then divided it to about 1/2 cup each for the remaining (and just mixing some orange food coloring in with the pink to finish off the noses!).

Chill the cookies:
After piping, I like to chill the cookies in the fridge for about 20 minutes to set the frosting. In my testing, I found just 20 minutes was enough for everything to harden while also not drying out the cookie.
If you plan on including these cookies in a cookie box that needs to stay “fresh” longer than 1 day, I actually recommend freezing the cookies rather than popping them into the fridge. The reason being is that the fridge will suck out all of the moisture from the cookies, where as the freezer will instantly lock in that moisture once completely chilled!

Want to save this recipe for later? Add it to your favorite recipe board on Pinterest!

If you make this recipe, please be sure to leave a comment and a rating ⭐️⭐️⭐️⭐️⭐️ below. This helps others to find the recipes! As always, I absolutely love to see your beautiful creations on Instagram and Pinterest, so be sure to tag me there as well!
Print
Soft Baked Frosted ‘Cream Cheese’ Sugar Cookies – No eggs, Dairy Free!
- Prep Time: 20
- Cook Time: 18
- Total Time: 38 minutes
- Yield: 26 1x
- Category: Cookies
- Method: Baking
- Cuisine: American
- Diet: Vegan
Description
These ‘cream cheese’ sugar cookies are honestly the best sugar cookie you’re ever going to have. They are melt-in-your-mouth, richly tangy yet perfectly sweet, soft, “buttery” and oh so moist thanks to using powdered sugar instead of granulated sugar. We then frost with a dairy free cream cheese frosting for the perfect decorated cookie for all of your cookie baking needs! The best part- you don’t need any eggs nor dairy to make the dough. It’s entirely and secretly vegan!
Ingredients
Cream cheese sugar cookie dough:
- 3/4 cup (180 g) vegan butter, room temperature
- 1/2 cup (113 g) vegan cream cheese, room temperature
- 2 cups (240 g) powdered sugar, sifted
- 1 tbsp vanilla extract
- 1/4 tsp almond extract
- 1/4 cup (57 g) dairy free yogurt
- 1/2 tsp baking powder
- 1/4 tsp sea salt
- 3 cups (375 g) all-purpose flour or gluten-free 1:1 baking flour
Cream cheese frosting:
- 1/2 cup (113 g) vegan butter, room temperature
- 1/3 cup (80 g) vegan cream cheese, room temperature
- 2–3 cups (240–360 g) powdered sugar, sifted
- 2 tsp vanilla extract
- 1/4 tsp sea salt
- Vegan food coloring
- Vegan sprinkles
Instructions
- Prep: Read through all ingredients and instructions before beginning.
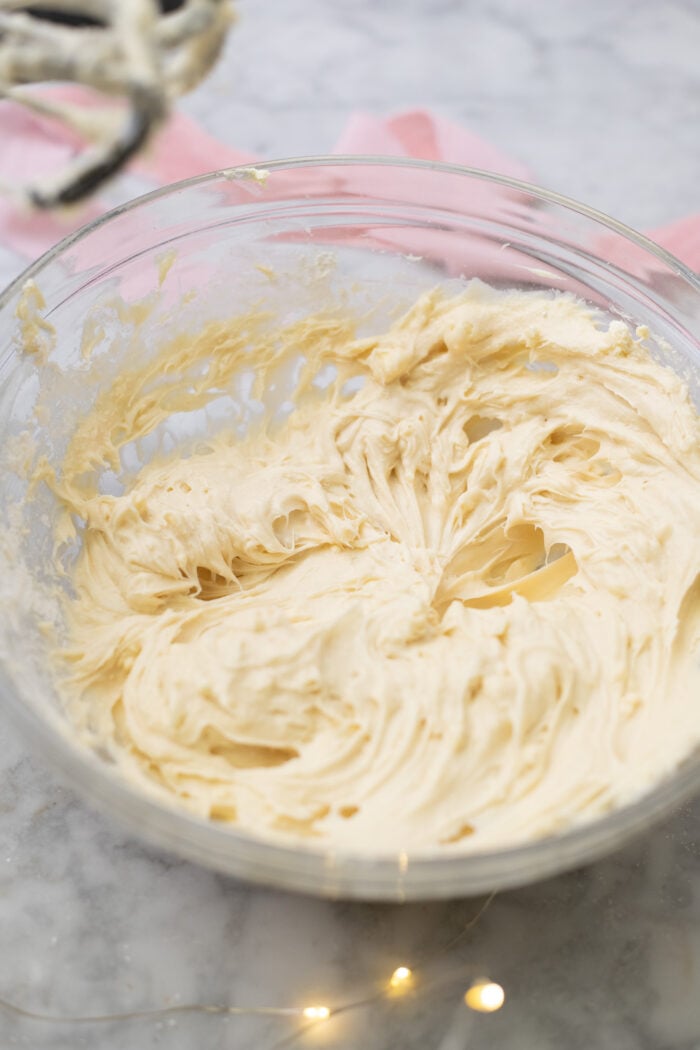
- Cream the butter and cream cheese: In a large bowl with hand mixer or in a stand mixer with paddle attachment, cream together the vegan butter and cream cheese until fluffy, about 2-3 minutes. Then add in the powdered sugar, vanilla extract, and almond extract and mix again until you get a fluffy frosting.
- Finish the dough: Add in the dairy free yogurt, baking powder, and sea salt, and mix again on medium speed until combined. Then add in the flour, and mix on low speed until you get a sticky dough. This dough will be very creamy and sticky, which is ideal. Be careful not to over-mix the dough here! Scrape down the sides and mix gently until all ingredients are JUST combined.
- Chill the dough: Spoon the dough onto a large piece of plastic wrap or parchment paper, and wrap the dough tightly in a large rectangular shape to be chilled in the fridge, preferably overnight but at least for 4-6 hours.
- Roll out the dough: When ready to shape, preheat the oven to 350F, and line a large baking sheet (or two medium baking sheets) with parchment paper. Heavily flour a clean surface, and place the dough into the middle. Flour the top of the dough as well as the rolling pin. Roll the dough out to be about 1/2″ thick. This seems thick, but these cookies bake up lovely!
- Shape the cookies: Lightly flour the slicing side of whichever cookie cutters you decide to use, and press the cookie cutter into the dough to create the shape. Remove the cookie cutter (sometimes the dough comes with it- if so, just place the cut-out cookie onto the prepared baking sheet. If not, you can get it at the end!). Cut out as many cookies as you can, then remove the scraps of dough (to be rolled out again!). Carefully use a spatula to place the cookies about 1″ apart on the prepared baking sheets. Place that tray into the fridge while you re-roll the rest of the dough, using up all of the dough. I yield about 26 medium-sized cookies each time I make this recipe.
- Bake: Once the cookies are all on the baking sheet, I like to chill the cookies in the freezer for 10 minutes before baking in the oven. When ready to bake, place the baking sheets on the middle rack of the oven to bake for 15-18 minutes, or until the edges of the cookie are JUST starting to turn a light golden color. Remove from the oven and let cool on the baking sheet for 10 minutes before transferring to a cookie rack to cool completely.
- Cool the cookies: Before making the frosting- you want to cool the cookies COMPLETELY. There should be no warmth to them whatsoever, or the frosting will slide right off.
- When ready to frost: Make the frosting by creaming together the vegan butter and cream cheese in a medium bowl with a hand mixer or in the bowl of a stand mixer with whisk attachment until fluffy, about 2-3 minutes. Add in the powdered sugar, vanilla extract, and sea salt, and mix again until you get a fluffy frosting.
- Decorate the cookies: Divide the frosting into your desired amount of bowls for colors (see blog post for tips on portioning out frosting for each color) and color the frosting. Pipe or smear the frosting onto the cookies!
- Serve and enjoy! Enjoy right away or let the cookies chill in the fridge for just 20 minutes to set the frosting OR freeze the cookies to enjoy later!


Notes
Gluten free: I recommend King Arthur Measure-for-Measure gluten-free flour.
See blog post for all tips and tricks!


I’m wondering if these could be made into bars instead of individual cookies? 🙂
Oh absolutely!!
I just realized my question was ambiguous- I meant can they be baked in a pan to cut into bars? 😅
Oh yes they can, don’t worry!! You can press the dough into a 9×9 or a 9×13 for thinner bars- the 9×9 will probably bake around 26-30 minutes, so just check for golden edges!
Gave u tried with coconut sugar or anything other than white sugar?
It can work with coconut sugar, but it will look and taste a bit different!
Is it possible to make these with regular cream cheese and butter?
I have not tested any of my recipes with non-vegan ingredients so I cannot guarantee success! I’m so sorry!
Delicious perfect sugar cookies for decorating! I’m saving this recipe!
This is awesome 🙂 WOW! Thank you so much for this review! ENJOY!!