Individual Vegan Eggnog Mini Pumpkin Pies
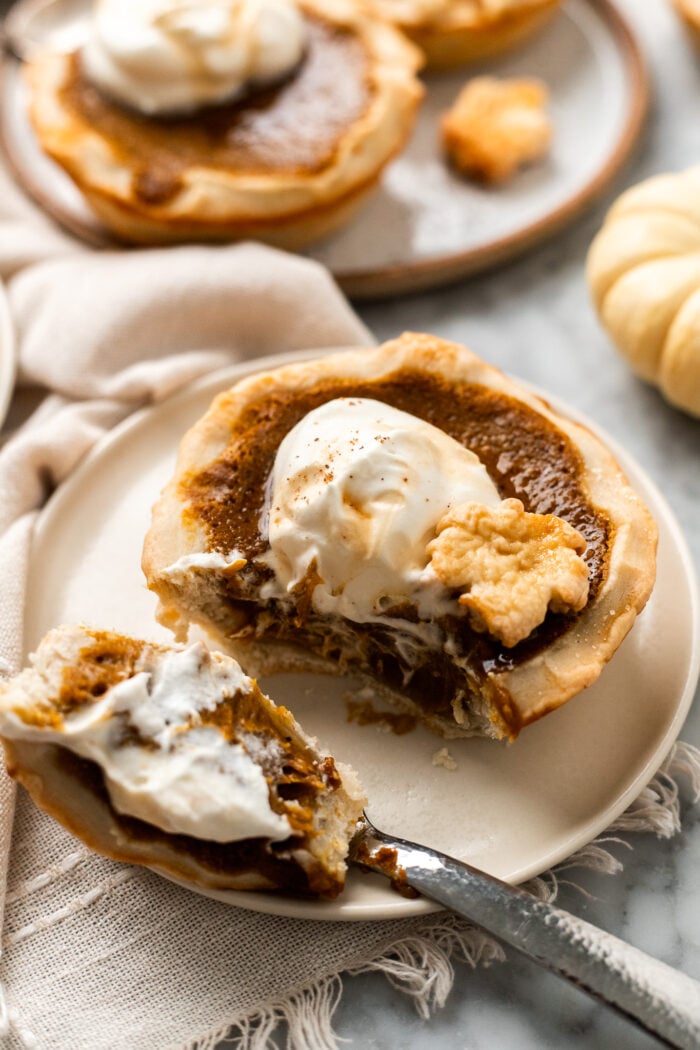
These adorable mini pumpkin pies are ultra creamy and silky with dairy free eggnog and baked in 5″ pie dishes! You don’t need any eggs nor dairy to make just 6 super easy mini pies- perfect for any Thanksgiving table!

This post contains affiliate links. This means that when you make a purchase from these links, I receive a small commission at no additional cost to you. All recommendations are based on my personal experience and preference! Thank you for supporting The Banana Diaries!
Why you’ll love these vegan mini pumpkin pies:
If you’re looking for a super easy and delicious Thanksgiving dessert to serve this holiday season that’s approachable for all baking levels, then you need to try these unbelievably creamy vegan mini pumpkin pies.
We have tons of amazing and unbelievably vegan Thanksgiving desserts on the blog, and these have to be up there as some of my favorite, and here’s why:
- Handheld and adorable! They’re the handheld version of my classic vegan pumpkin pie recipe, but even easier to make (because that pie is SUPER easy), and requires way less time to set and chill! I’m serious, the only equipment you need is a food processor to make both the pie dough and the filling!
- All of the flavors of pumpkin pie- but easier: we’re talking true classic pumpkin pie- lush, creamy, silky, and rich with nutmeg, cinnamon, ginger and cloves. But with even more richness to these mini pumpkin pies with using vegan eggnog instead of just dairy free cream. The extra spice and fat from the eggnog will lend itself to the ultimate silky pie filling.
- You can make these as either 5″ mini pies or muffin-sized mini pies: You can make these mini pies as either 6 5″ pumpkin pies (great for a smaller Thanksgiving gathering!) or 12 muffin-sized pumpkin pies (the perfect bite sized treat for a crowd!). If you’re serving a BIG Thanksgiving dinner, then a small pie might be just the treat!
- You need just one full can of pumpkin puree: How simple is that?! No leftovers!
- No one will know these mini pumpkin pies are vegan: Great for any allergies you’re accommodating- no eggs, no dairy, and yes you can make them gluten free!

Top with a dollop of dairy free whipped cream, and serve!
The Simplest Ingredients
- Pie dough: We’re using just one batch of my classic pie dough. It’s so flaky and really easy to make in a food processor! If you’re gluten-free, check out my easy flaky gluten free pie crust (also vegan). You can also use a store-bought vegan pie dough.
- Pumpkin puree: I have tested this recipe with homemade pumpkin puree, and it works!
- Homemade vegan eggnog: This is my favorite part- I LOVE the flavor of the eggnog that comes through in this pie. Plus it’s super creamy, and adds even more richness to the pumpkin pies. You can store-bought vegan eggnog here as well.
- Cornstarch: This is our vegan egg substitute that acts as the eggs in traditional pumpkin pie. Personally, I think the texture is much better with just cornstarch than with eggs, and I think you’ll agree. Plus, you won’t get any cracks in the top of your pie!
- Pumpkin pie spice
- Maple syrup
- Light brown sugar: You can also use coconut sugar if you’d like to keep these vegan mini pumpkin pies entirely refined sugar free.

Overview: how to make vegan eggnog mini pumpkin pies:
For the full written instructions and ingredient measurements, see the bottom of this post in the recipe card. You can also hit the “jump to recipe” button at the top of this post! Here, we’ll go over a brief overview of the steps, along with providing visuals for a better understanding of the recipe.


Can I make these as regular mini pumpkin pies?
If you don’t want to include the eggnog flavor, that’s totally fine! Simply swap in a dairy free milk, such as oat milk, soy milk or almond milk.
In terms of other ingredients, like using eggs, there’s really no need. The cornstarch replaces the eggs completely, and is typically found in a traditional thanksgiving pumpkin pie anyways, so that’s all you need!
How do you know when mini pumpkin pies are done?
That’s a great question! So they’ll definitely seem more firm and set than with a large, regular sized 9″ pie (which usually jiggles quite a bit). The edges of your crust will be slightly darker as well! These bake quite quickly, so the recommended 28-33 minutes.

Can I use a muffin tin?
Absolutely! If you didn’t want to make 6 individual pies, you can easily make even tinier pumpkin pies in a muffin tin. To do so, you’ll roll out the crust to about 1/8″ thick- it’ll be quite thin.
Then cut a circle with a knife that’s about 1/2″ wider than the muffin tin circle. Repeat for as many circles as you can make before needing to re-roll the dough. You’ll need about 12 for a regular muffin tin.
Press the pie dough into your muffin pan (no need to grease the edges- the pies will come right out!), fill with the pumpkin pie filling, then bake! They’ll bake for about 20-25 minutes.
If you make this recipe, please be sure to leave a comment and a rating ⭐️⭐️⭐️⭐️⭐️ below. This helps others to find the recipes! As always, I absolutely love to see your beautiful creations on Instagram and Pinterest, so be sure to tag me there as well!
Print
Individual Vegan Eggnog Mini Pumpkin Pies
- Prep Time: 25
- Cook Time: 30
- Total Time: 55 minutes
- Yield: 6 5″ pies
- Category: pie
- Method: baking
- Cuisine: American
- Diet: Vegan
Description
These adorable mini pumpkin pies are ultra creamy and silky with dairy free eggnog and baked in 5″ pie dishes! You don’t need any eggs nor dairy to make just 6 super easy mini pies- perfect for any Thanksgiving table!
Ingredients
- 1 15-ounce can pumpkin puree
- 1/2 cup (120 mL) vegan eggnog (or dairy free milk, like oat milk or soy milk)
- 1/2 cup (120 mL) maple syrup
- 1/4 cup (50 g) light brown sugar
- 1/4 cup (40 g) cornstarch
- 1 tsp vanilla extract
- 1 tbsp pumpkin pie spice
- 1 batch homemade vegan pie crust
- Vegan egg wash: 1 tbsp maple syrup + 1 tbsp soy milk
Instructions
- Prep: Prepare the homemade pie crust first, giving it time to chill in the fridge before rolling it (about 30 minutes at the minimum). Make sure you have 6 5″ pie dishes. Alternatively, you can use a 12-cup muffin pan. When you’re ready to roll the pie dough, preheat the oven to 350F.
- Roll the dough: Lightly flour a clean surface, and roll the dough out to be 1/4″ thick for the 5″ pies, or 1/8″ thick for the muffin-sized pies. Place a mini pie onto the dough, and use a sharp knife to carefully cut a circle about 1/2″ wider from the rim of the pie dish. Repeat, fitting as many pie circles as you can before needing to re-roll the dough. If you have any extra dough, you can save that for pie cut outs!
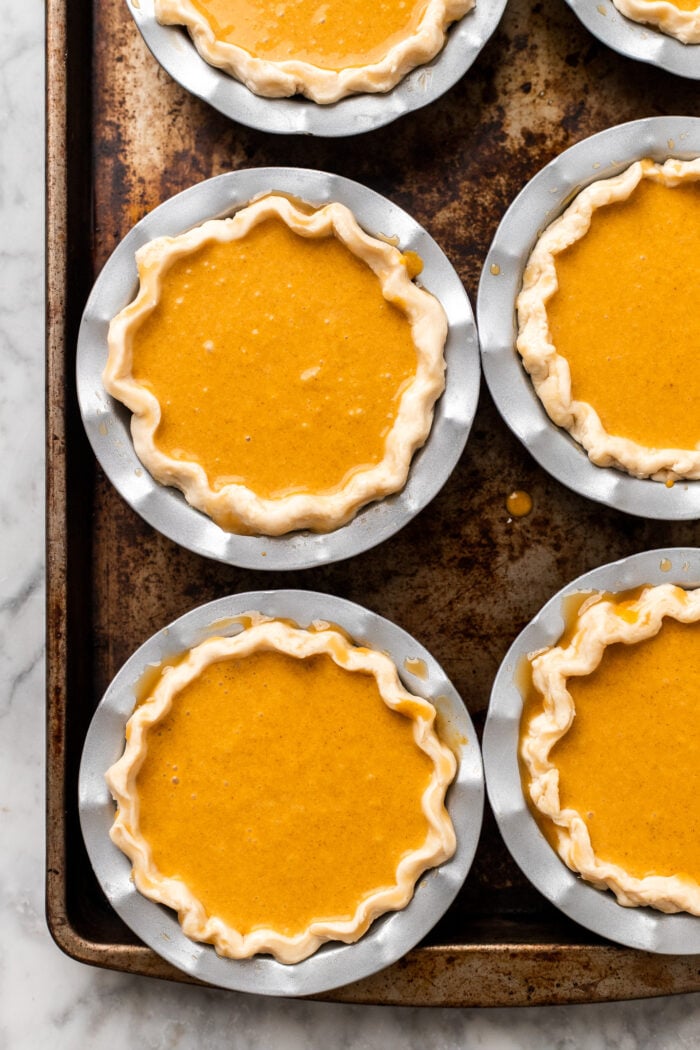
- Shape the pie crusts: Place one circle into a pie dish, and shape the rim of the pie using either your fingers or pressing the back of a fork into the pie crust. Repeat for all of the pies, and place them onto a baking sheet and into the freezer to chill while you make the pumpkin pie filling. If your pie circle is a bit short on the sides of the pie dish, you can roll it a bit wider!
- Make the pumpkin filling: In a food processor, add in the remaining ingredients (pumpkin puree, vegan eggnog, maple syrup, brown sugar, cornstarch, vanilla extract, and pumpkin pie spice), and blend until smooth.
- Fill the pumpkin pie crusts: Pour the filling into each pie crust, filling to nearly the rim. Brush the rim of the pies with the vegan egg wash, as well as any pie cut outs.
- Bake: Keep the pumpkin pies on a baking sheet, and place the pie cut outs onto a separate baking sheet (they’ll only need 12-15 minutes to bake). Place the baking sheets into the oven to bake for 28-33 minutes, or until the pumpkin pie filling isn’t wiggling, and the crust is golden brown.
- Cool: Allow the pumpkin pies to cool and set at room temperature for 20-30 minutes.
- Serve: Top with a dollop of homemade vegan whipped cream or store-bought and a sprinkling of cinnamon for decoration! Serve and enjoy! Store any leftovers in an airtight container and in the refrigerator for up to 5 days.
Notes
See blog post for all tips & tricks!


Would it be possible to make these ahead of time and then freeze these?
Hi Haley! Absolutely! Just be sure to store them in an airtight container and let them thaw in the fridge overnight!