

Classic New York Vegan Cheesecake Recipe
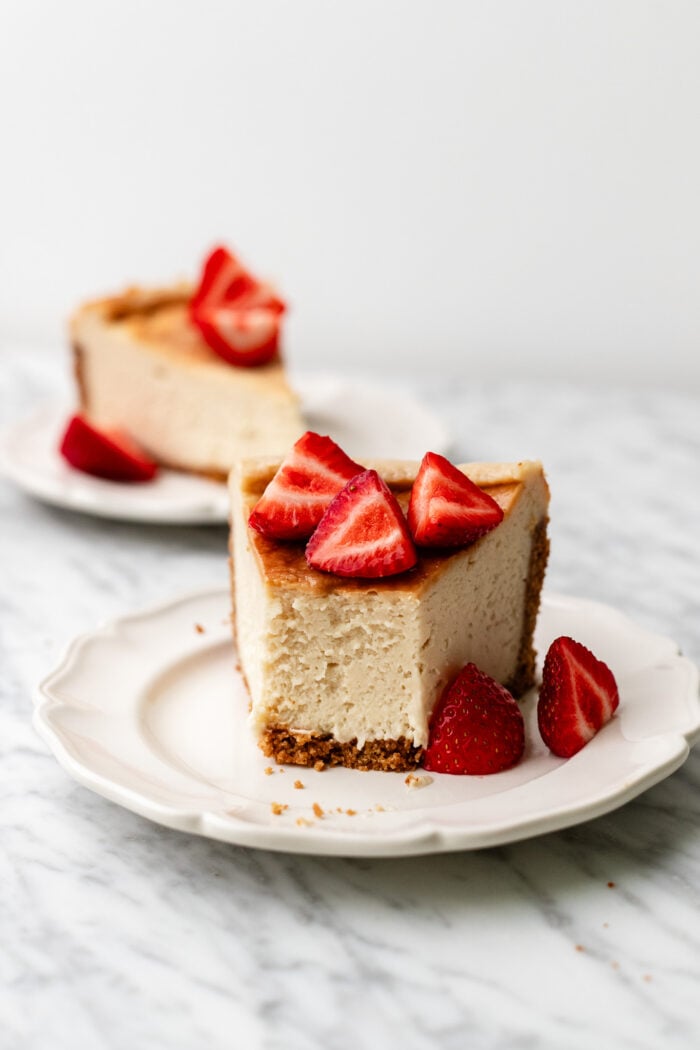
This ultra creamy and rich vegan cheesecake tastes JUST like classic New York baked cheesecake, and it only needs 7 ingredients (NO tofu, no cashews though!). And it’s SO easy to make with my simple steps to ensure you get the creamiest and perfectly tangy vegan cheesecake ever!
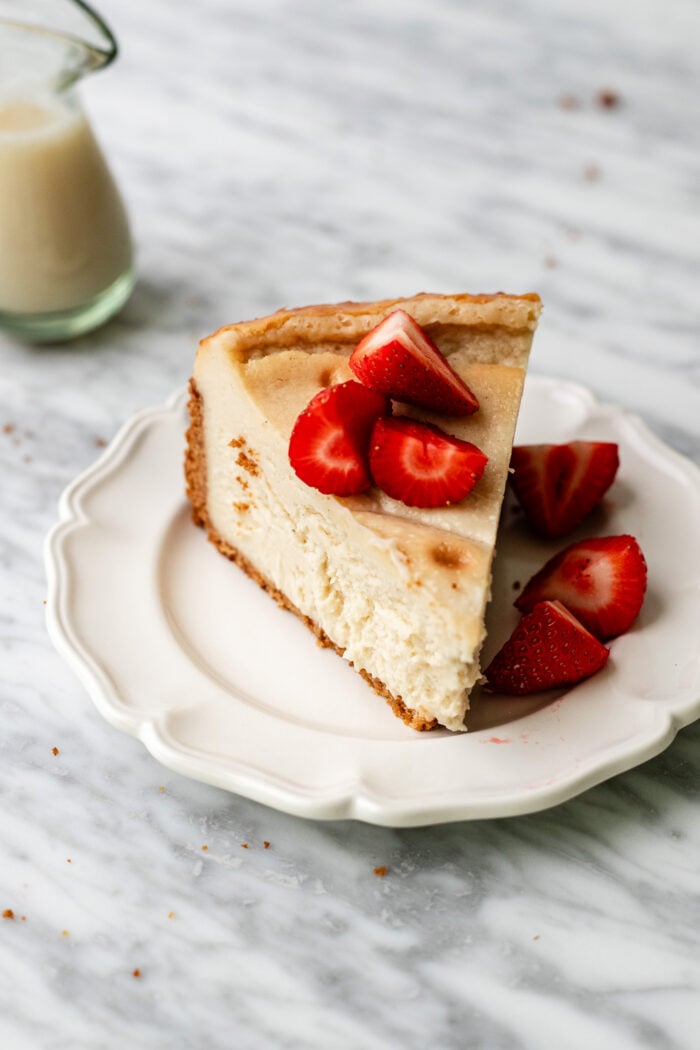
Table of contents
A classic New York-style cheesecake- made vegan:
Truly. It took me years to develop an amazing baked vegan cheesecake that tastes just like a slice of classic cheesecake: super rich, ultra creamy, decadent, and just sweet with the perfect tang. Rich, like New York cheesecake, but made at home, and all without eggs and dairy.
And make it easy, too.
Plus you don’t need to soak any cashews beforehand nor prep any tofu. This vegan cheesecake is made entirely without cashews, tofu, nor coconut cream, and the result is ultra velvety, creamy, and lush. And we’re only using 7 simple ingredients too!
What I love most about this recipe, from a recipe developer’s standpoint , is that it can now be used as the base recipe for other cheesecakes. In fact, it’s inspired some of my most popular cheesecake recipes, including my caramel cheesecake, cannoli cheesecake, tiramisu cheesecake, and pistachio cheesecake!
The only 7 ingredients you need:
- Vegan cream cheese: Many vegan cream cheese do use nuts, I am aware of this. That’s why I made my 3-ingredient homemade vegan cream cheese that’s NUT FREE and soy free. For store bought, I personally love Tofutti and it works wonderfully in this recipe. However, for my soy-free readers, I have tried this cheesecake with Kite Hill and it is a DREAM!
- Dairy free yogurt: You can use your favorite here (mine is Forager Project); whether it’s oat milk yogurt, cashew milk, coconut yogurt, soy milk yogurt, or almond. Using dairy free yogurt also helps us to replace the silken tofu found in other vegan cheesecake recipes, and lemon juice.
- Vegan heavy cream: Most classic cheesecake recipes don’t use heavy cream, but I’ve found in my testing, vegan heavy cream helps to really set beautifully with the cornstarch to add an extra richness and slightly denser mouth feel that comes with traditional cheesecake.
- Cornstarch: Our other egg replacement here that helps everything beautifully set! You can also use arrowroot starch.
- Sugar: I used organic granulated sugar here. Be sure that your sugar is truly vegan. I always personally use Florida Crystals Sugar for that reason. They’re also minimally processed!
- Vanilla extract: Sub in vanilla powder if you’d prefer!
- Graham cracker crust: This homemade graham crackers and vegan butter to achieve a deliciously buttery vegan gluten free graham cracker crust! You could also sub in melted coconut oil for the vegan butter if you’d prefer!
Why we’re using cold vegan heavy cream and room temperature vegan cream cheese
This is crucial for making a fluffy vegan cheesecake that looks and tastes like the classic.
Room temperature cream cheese will help the cream cheese integrate into all the remaining ingredients much more easily. Cold vegan cream cheese, like traditional cream cheese, clumps very easily and won’t cream into other ingredients.
However, cold vegan heavy cream will help create volume in our cheesecake. Since cream integrates easily into ingredients warm or cold, this isn’t a concern here. But cold heavy cream, like when making whipped cream, will thicken and aerate, which will help give our cheesecake a bit of volume while baking!
Overview: How to make a vegan cheesecake:
Step 1: The vegan cheesecake crust
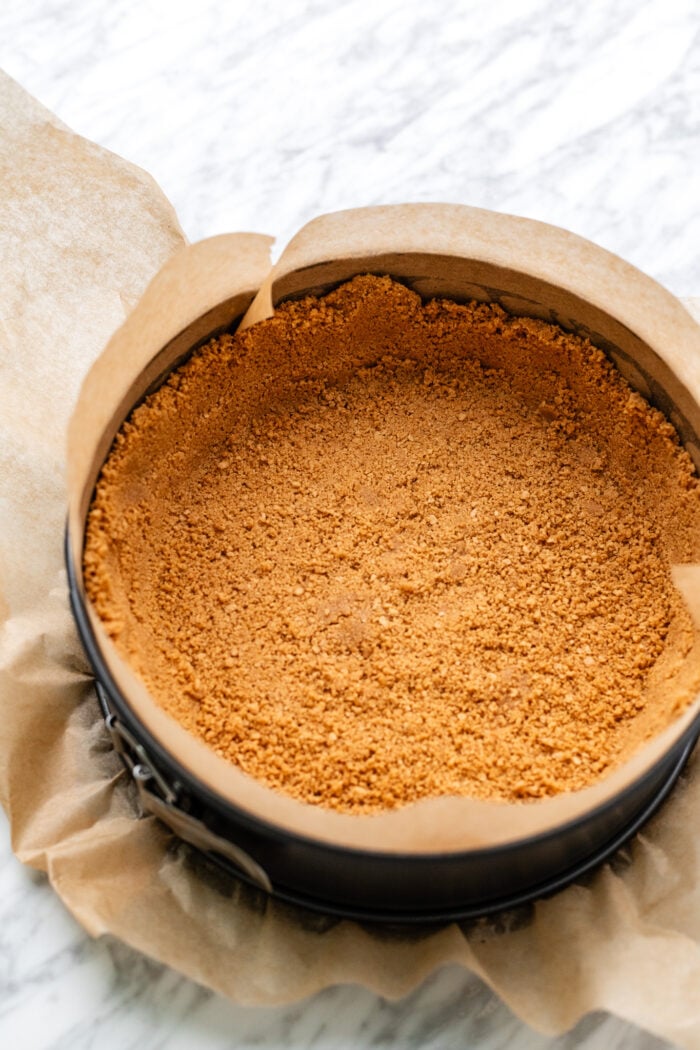
Must like a traditional crust, you’ll just blitz together the graham crackers into a fine crumb, then mix in the melted vegan butter.
Press into the pan and up the sides of the wall before baking. While the crust is baking, we’ll make the filling and boil the water for the water bath.
Step 2: The vegan cheesecake filling
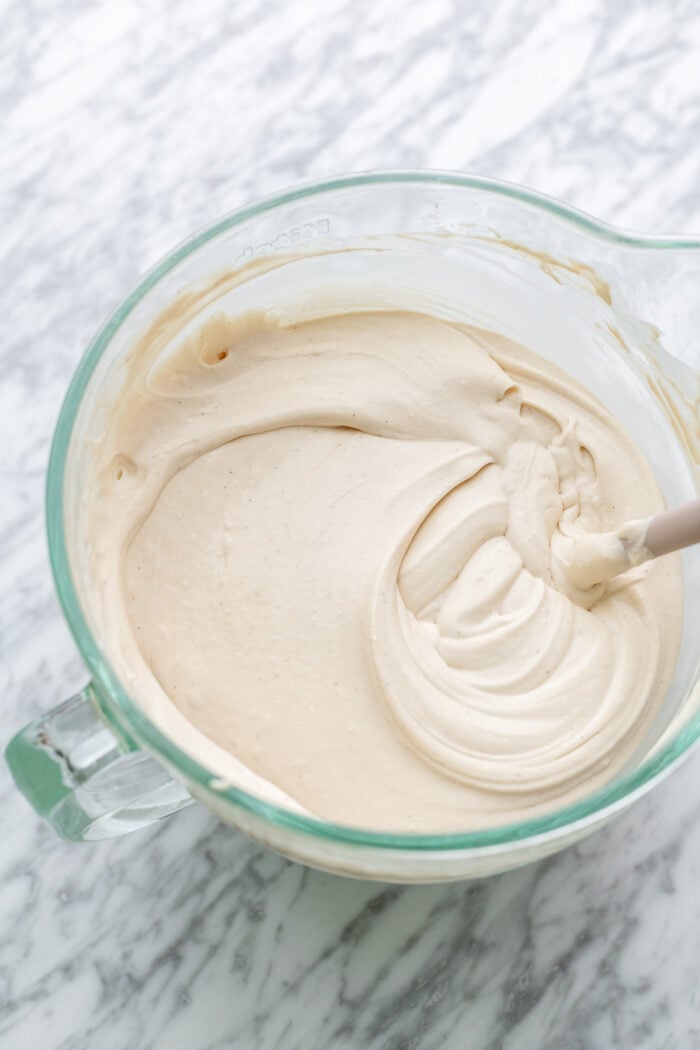
When developing this recipe, I’ve tried several different methods, including just using a food processor (originally, this was my go-to method). And while the cheesecake will still taste lovely with a food processor, you really get that airy, velvety texture when you use a stand mixer or hand mixer.
So this is the method I recommend going forward, which is very similar to making a traditional cheesecake!
- Mix: You’ll add the cream cheese into the bowl of a stand mixer or large bowl and cream until fluffy. Then add in the remaining ingredients, save for the heavy cream, and mix again to incorporate. Finally, we’ll pour in the vegan heavy cream and whisk again until fluffy.
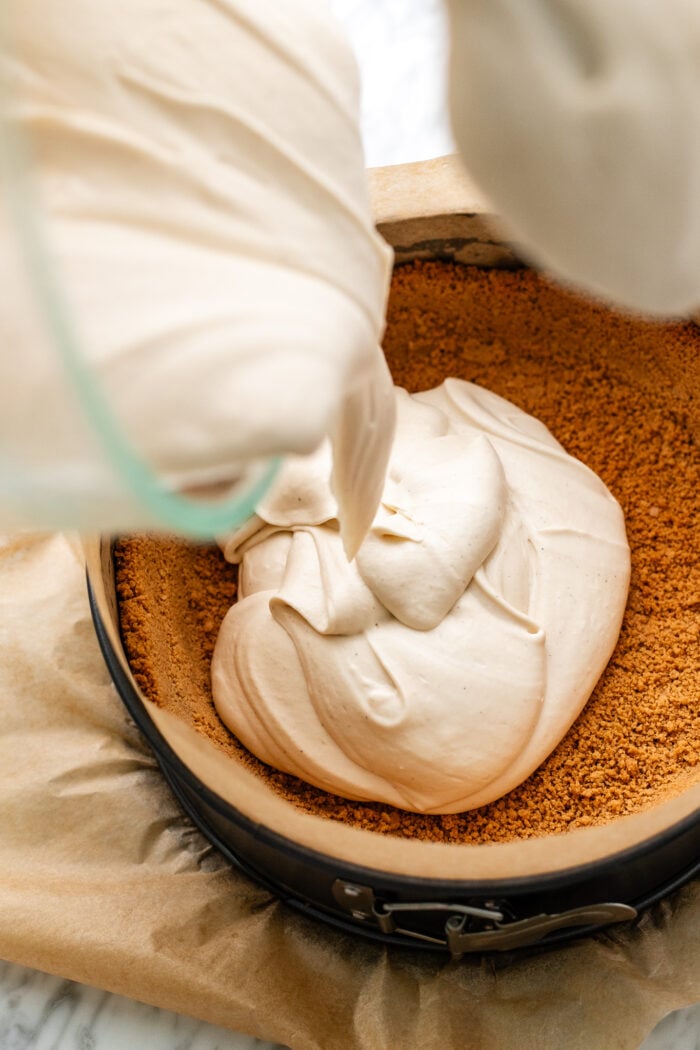
- Pour: Next, pour the cheesecake mixture over the crust.
- Create the water bath: Pour boiling water into a baking sheet with walls or casserole dish, placing it on the lower rack of the oven.
- Bake: Place your vegan cheesecake onto the middle rack. Close your oven quickly to prevent anymore heat from escaping.
- Cool in the oven: Once baked, allow your vegan cheesecake to cool in the oven to 10 minutes. Then remove the cheesecake to cool at room temperature for 15 minutes.
- Setting time: Place your room temperature vegan cheesecake into the fridge to set for 4-6 hours, or until not wobbly anymore.
- Serve and enjoy!
A note on the wiggliness of your cheesecake once baked:
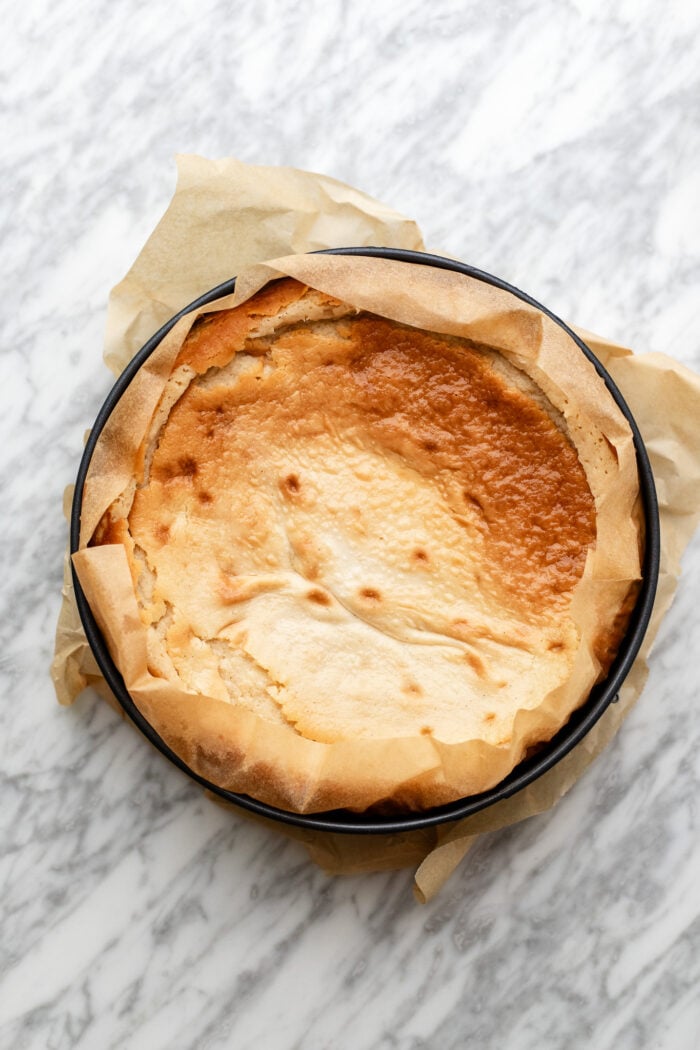
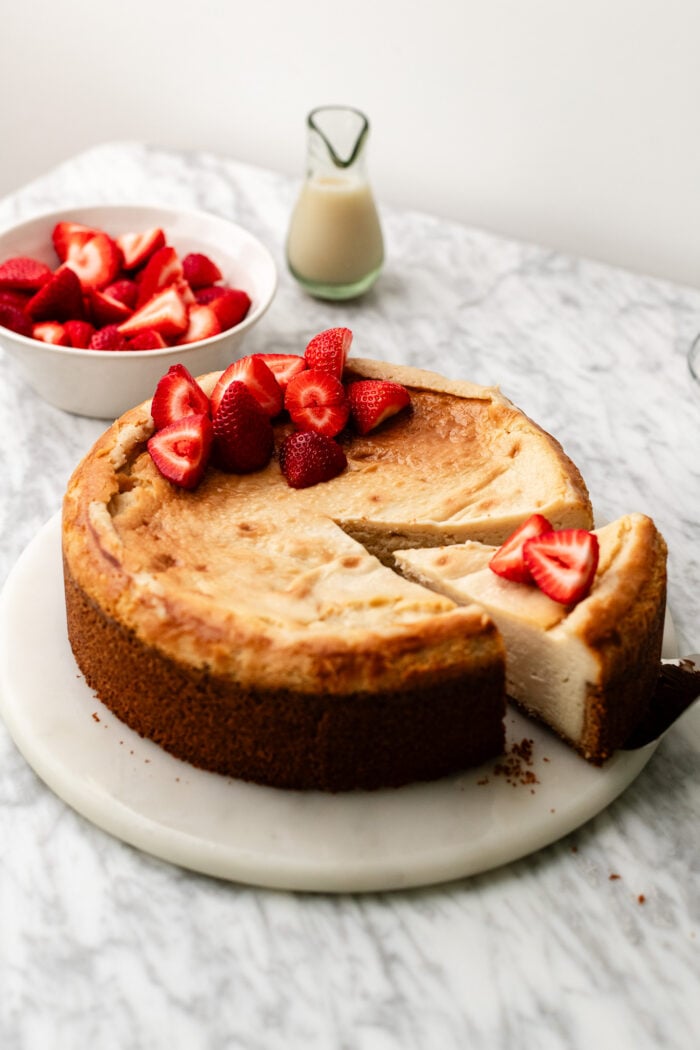
When you stop the cheesecake from baking initially, it will still wiggle. You will THINK it’s not baked fully, but I can assure you that it is! This is why you need to let the cheesecake set overnight. As it sets overnight, the ingredients will cool and solidify, allowing the cornstarch to set and thicken as well.
Watch how to make a vegan cheesecake:
Why we’re cooling the cheesecake in an OFF oven at first:
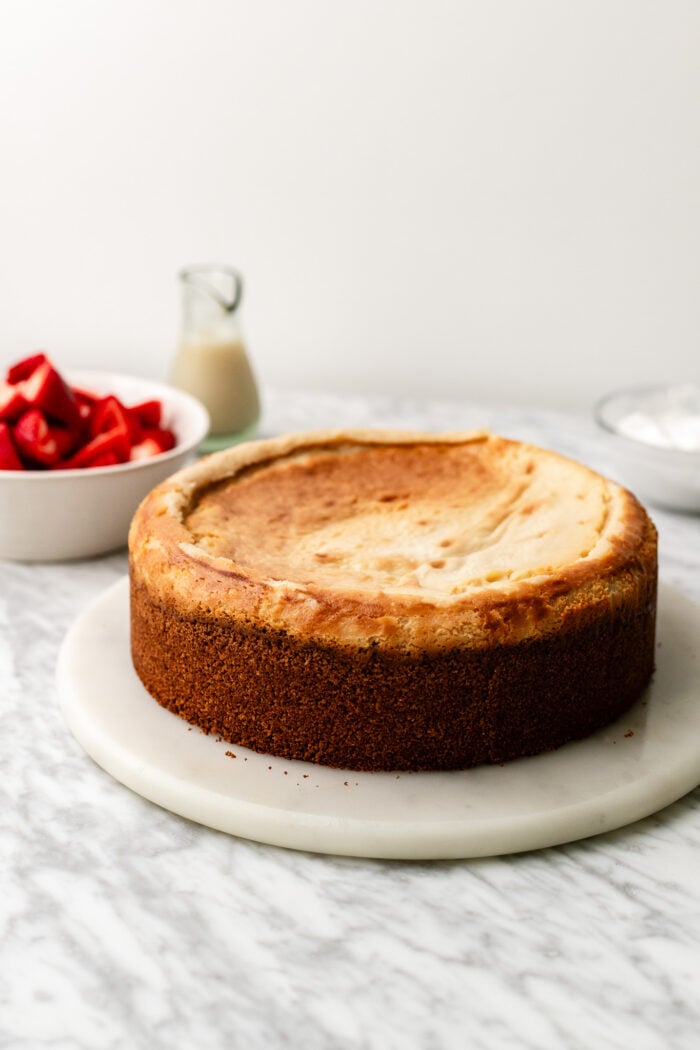
This is a crucial step to baking your cheesecake. Once the cheesecake has baked, we’ll turn the oven off, but crack the oven to allow the cheesecake to cool. This will allow the cheesecake to cool slowly rather than being shocked from a super hot environment to a much cooler one (also preventing any cracking!).
This is what happens if you cool a cheesecake immediately from the oven to room temperature:
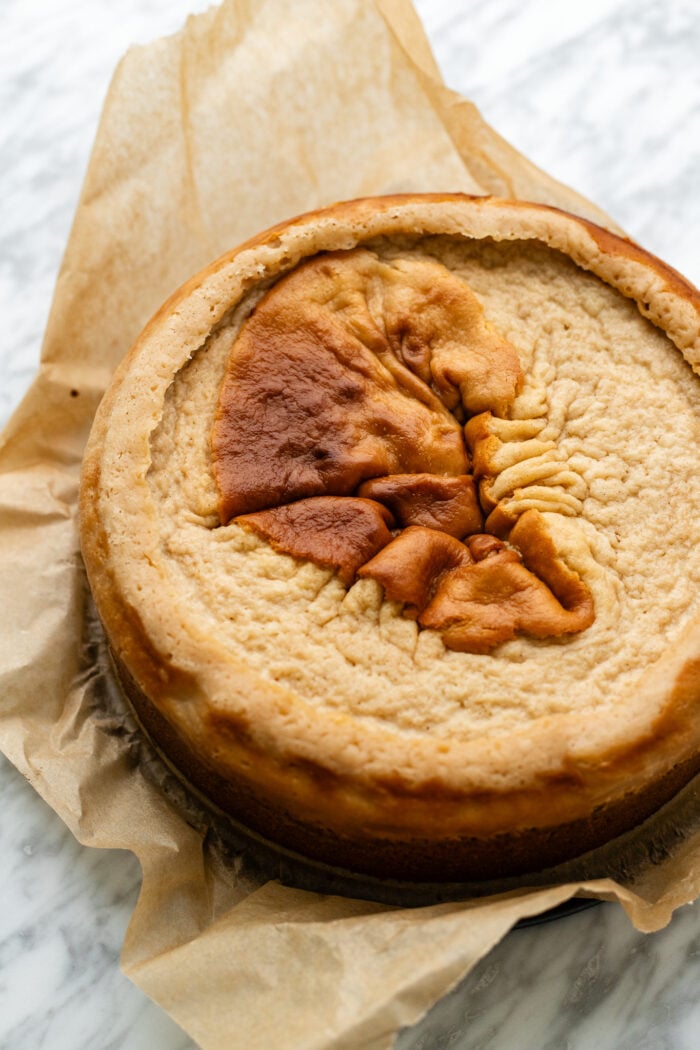
The cheesecake will begin to pull away from the edges of the pan (which is why it’s super important to line the walls of your cheesecake pan as well!). Then we’ll cover it and refrigerate overnight so that it thickens and sets!
More vegan cheesecake recipes you’ll love:
Baked Vegan Chocolate Cheesecake
Vegan Apple Crumble Cheesecake
🌟MADE THIS RECIPE & LOVED IT?🌟I’d love it if you’d like a comment and a rating ⭐️⭐️⭐️⭐️⭐️ below! This helps others to find the recipes! As always, I absolutely love to see your beautiful creations on Instagram and Pinterest, so be sure to tag me there as well!
Print
Classic New York Vegan Cheesecake Recipe
- Prep Time: 15
- Chill Time: 240
- Cook Time: 65
- Total Time: 5 hours 20 minutes
- Yield: 16 1x
- Category: Cheesecake
- Method: Baking
- Cuisine: American
- Diet: Vegan
Description
This ultra creamy and rich vegan cheesecake tastes JUST like classic New York baked cheesecake, and it only needs 7 ingredients (NO tofu, no cashews though!). And it’s SO easy to make with my simple steps to ensure you get the creamiest and perfectly tangy vegan cheesecake ever!
Ingredients
Vegan Graham Cracker Crust:
- 18 sheets or 1 batch (300 g) vegan graham crackers or Lotus Biscoff Cookies
- 1/2 cup (113 g) melted vegan butter
Vegan Cheesecake Filling:
- 32 ounces vegan cream cheese, room temperature
- 1 cup (240 g) dairy free yogurt or dairy free sour cream, room temperature
- 1 cup (240 mL) vegan heavy cream, cold
- 1 cup (200 g) granulated sugar
- 9 tbsp (90 g) cornstarch or arrowroot starch
- 1 tbsp vanilla extract
- 3–4 cups boiling water, for water bath
- Fresh strawberries, for topping
Instructions
- Prep: Line a 9-inch springform pan with parchment paper. Grease the edges of the pan with a bit of cooking or coconut oil as well, and line with parchment paper. Preheat the oven to 400F. Bring 3-4 cups of water to a boil while you make the recipe (for the water bath).
- Make the crust: Add the graham crackers or cookies to a food processor, and pulse until you reach a fine crumb. Then add in the melted vegan butter, and pulse again until you get a wet crumb. Press the cookie crumbs into the bottom of your cheesecake pan, working up the sides of the pan as well. Place the pan into the oven to bake for 7 minutes. Once baked, remove from the oven.
- Important: Reduce the oven temperature to 325F.
- Make the cheesecake filling: In a stand mixer with whisk attachment, or large bowl with hand mixer, cream the cream cheese until fluffy, about 2-3 minutes. Add in the dairy free yogurt, sugar, vanilla extract, and cornstarch. Cream together again until smooth. Then pour in the vegan heavy cream and whisk again for about 2-3 minutes to integrate. Scrape the bottom and edges of the bowl in between mixing to ensure everything is incorporated. Pour the cheesecake filling into the springform pan, and smooth the top. Place the cheesecake pan onto a baking sheet.
- Create the water bath: Place a large casserole dish onto the low rack of the oven. Pour the boiling water into the casserole dish. Close the oven door.
- Bake the cheesecake: Place the cheesecake baking sheet onto the middle rack and quickly close the oven to bake for 75 minutes, or until the the top of the cheesecake lightly golden. The center is set but still wiggly. Once baked, turn off the oven, and keep the cheesecake in the oven but crack the oven door. Allow the cheesecake to sit in the oven for 1 hour. The cheesecake will still be a bit wiggly. This is completely fine and should be that way. This cheesecake will not seem cooked at all when you first turn off the oven.
- Chill the cheesecake: Remove the cheesecake from the oven and allow the cheesecake to cool at room temperature for 15 minutes. Then cover and place the cheesecake into the fridge to chill for 4 hours, or overnight.
- Serve and enjoy! When ready to serve, top with fresh berries, cherries, or jam, and enjoy! Store any leftover cheesecake in an airtight container and in the fridge for up to 4 days.
Notes
Cornstarch Starch: make sure that your cornstarch or arrowroot starch (also called powder) is stored properly and is still active. Improperly stored or expired arrowroot will not work. You can also swap in an equal amount of cornstarch.
Vegan heavy cream: If you can do cashews, you can use cashew cream.
Water bath: Using a water bath is extremely important for a moist cheesecake! Please see blog post for all tips.
Gluten free: Swap in gluten free vegan graham crackers or gluten free homemade biscoff cookies!
Please read the above blog post for all tips & tricks on how to make this baked vegan cheesecake, as well as watch the quick YouTube tutorial! Thank you!


Hi,
sorry just found the oven temp.
No problem!! I hope you love it, enjoy!!
Hi,
instructions say turn oven down to 325F but I can’t find anywhere that say what to set it at to cook the base? Am I missing something
I’m confused. a water bath normally means you put the cake right into the water when cooking. is the water for this on av different. lower. rack?
Hi Barb yes let me help you out! So a traditional water bath submerges the cheesecake in the pan. I’m still calling it a “water bath” even though it’s a variation on it because you don’t need to submerge the cheesecake in order to reap the benefits of having hot water in the oven. We simply want to create a moist environment for the cheesecake to bake in. So the “water bath” that I use is a separate pan that goes on the lowest rack of the oven. You’ll bake the cheesecake (I recommend placing it onto a baking sheet still) on the middle rack to bake. I hope that helps!
Thanks, did watch the tutorial after the fact and that also answered my question. sorry!!. made this on the weekend for Thanksgiving(canada). My daughter said this is FIRE!! Gave everyone a slim slice to start thinking it may not be great. Everyone LOVED this and the daughter I reference went back 4 times for more. 4!!! then took what was left home. She is not a desert eater..ever. Mine looked exactly like yours.. which never happens to me. I made a blueberry, strawberry compote for each slice along with coconut whip cream. This recipe is perfect and was quite easy to put together. I’ve found the recipe to never lose Thank you for your efforts to make this perfect…it is.. got eaten too fast to get a Pic but it was exactly a duplicate of yours.
Have you ever tried subbing Maple Syrup for the Sugar?
Do you reduce the amount of cream to balance the amount of liquid?
Thanks!
Yes!! So subbing in maple syrup gets tricky- I would actually recommend subbing in granulated maple sugar (which is just maple syrup that’s been crystallized) because that is just a 1:1 swap with the granulated cane sugar. I hope that helps!