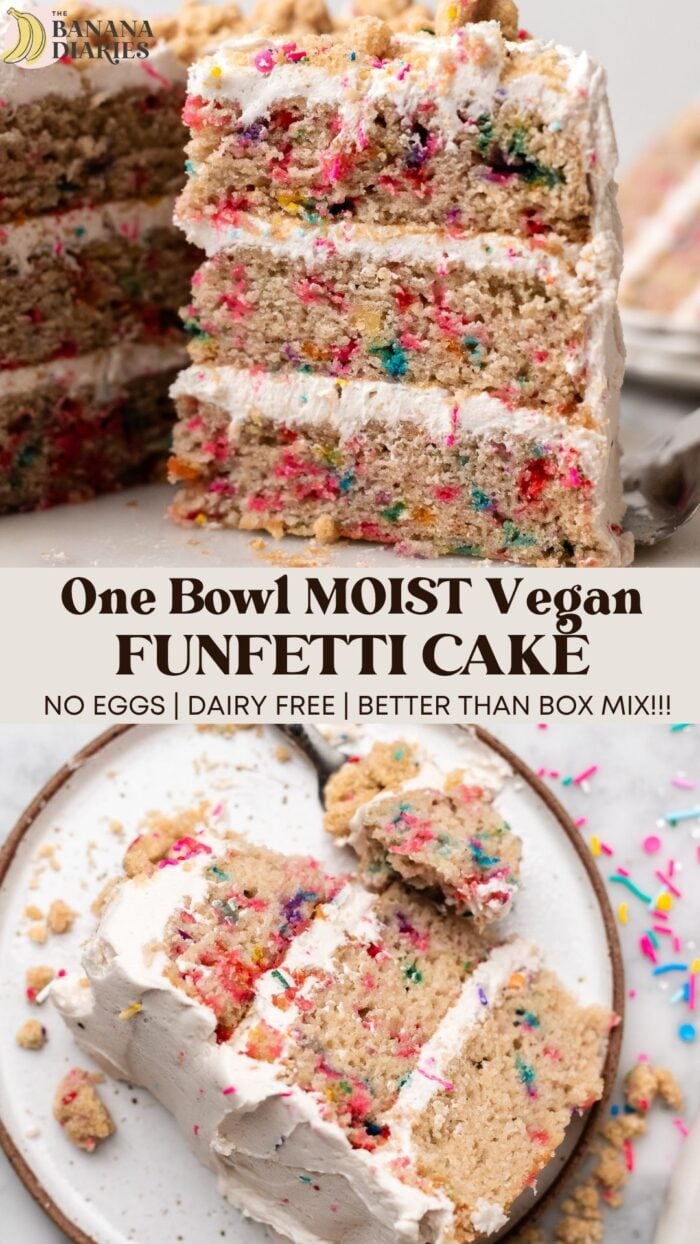
One Bowl MOIST Vegan Funfetti Cake – Better Than Box Mix!
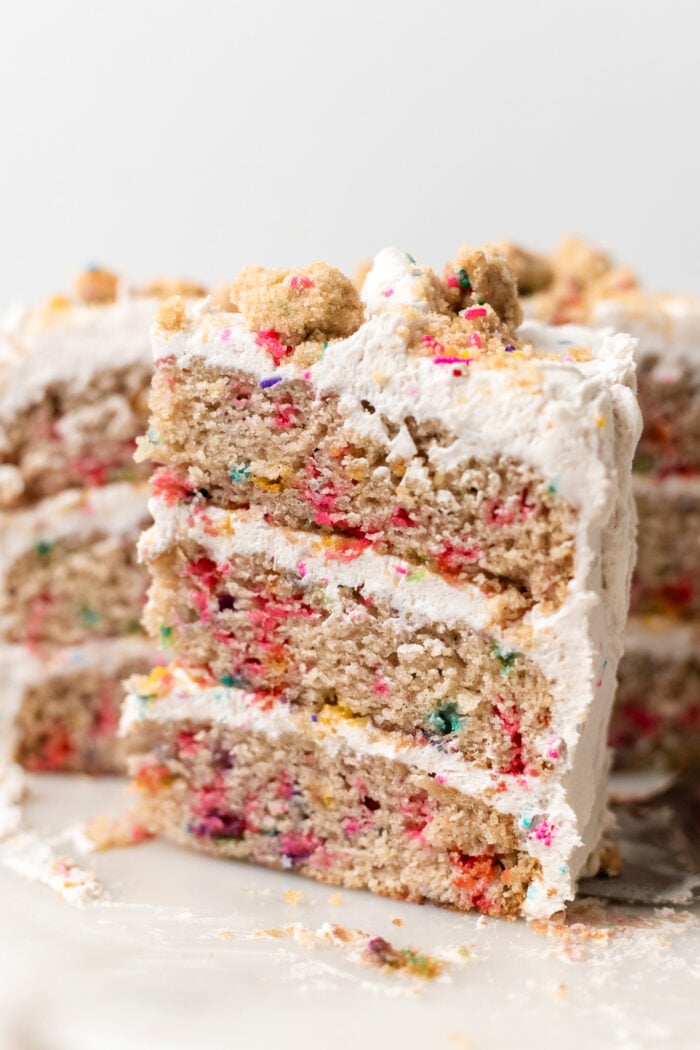
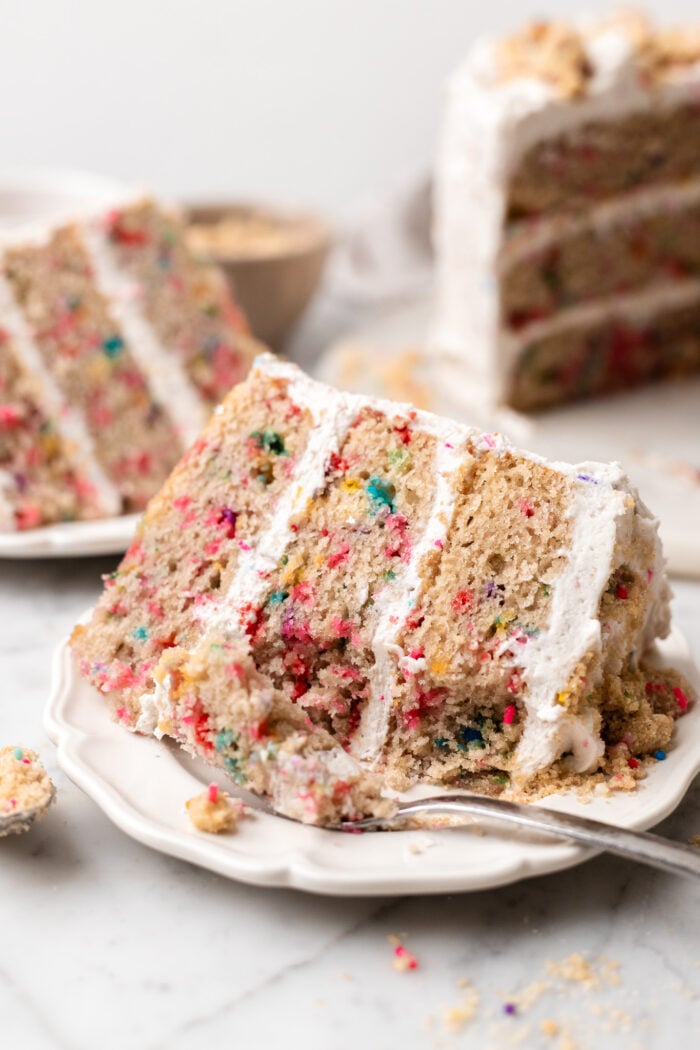
This vegan funfetti cake is somehow as easy as box mix yet tastes even better?! With a super moist, tender, and “buttery” sweet crumb full of rainbow sprinkles, and absolutely NO eggs nor dairy, every bite of this cake is pure rainbow nostalgia!
Why you’ll love this homemade vegan funfetti cake:
When it comes to vegan birthday cakes, you just need all the sprinkles.
And with this ultra tender and moist vegan funfetti cake, you’ll be sure to please a crowd. All you need is one bowl, 9 ingredients, and some patience while this cake bakes (trust me, the aroma that will be coming from your kitchen will be very hard to resist!).
This is truly the best homemade vegan funfetti cake for a few reasons.
I’ve had not one, not two, not three, but four random taste testers confirm that this is the best funfetti cake they’ve ever had…period.
That’s why I immediately had to make a vegan Funfetti cupcake based off of this recipe).
The homemade vegan funfetti cake is:
- Moist & fall-off-the-fork tender
- Rich with sweet and buttery notes of vanilla
- Sprinkled with pops of all natural plant based color
- Light & fluffy
- Undetectably allergy friendly for those that need dairy free, egg free, easily gluten free, and nut free
You also only need one bowl, and you can easily make this funfetti cake by hand or by stand mixer.
Funfetti cake ingredients:
Making an amazing vegan birthday cake comes down to the process.
You’ll probably be shocked to learn that our ingredients are actually really simple and probably already in your pantry:
- Flour: you can use all purpose flour, cake flour, or gluten free 1:1 baking flour. I use King Arthur all-purpose flour all the time here, but for gluten free, I use King Arthur measure-for-measure gluten free flour.
- Sugar: Make sure your sugar is either organic or certified vegan- otherwise your sugar may not be truly vegan!
- Dairy free milk with apple cider vinegar: this creates a vegan buttermilk. You can use soy milk, almond milk, oat milk, coconut milk, or whatever your favorite is!
- Vegan butter: My personal favorite is Miyoko’s but a good nut-free option is Plant Crock (country crock).
- Unsweetened dairy free yogurt: This is my favorite vegan egg substitute for cakes. Instead of going through the process of making aquafaba “eggs,” you can simply use yogurt! I also love using applesauce too.
- Vanilla extract: the recipe card says 1 tablespoon – the perfect amount of vanilla!
- Vegan sprinkles: For this vegan funfetti cake, I used Sweetapolita vegan rainbow sprinkles. They’re my go to for amazing vegan sprinkles. The one thing I will note about this sprinkle blend in particular is that the blue sprinkles run their color almost instantly upon being put into a batter, so you have to mix VERY gently (which will hopefully also prevent you from over-mixing your cake 😉 ).
More notes about sprinkles: many sprinkles are not vegan; if you do follow a vegan diet specifically, please ensure that the sprinkles that you’re using are indeed plant based. My preferred brands are Sweetapolita, Baking Time Club (all are vegan- order online, as they ship from the UK), Fancy Sprinkles (just check which ones are vegan), Go Supernatural! Rainbow Crunchies, Whole Foods 365 Brand Sprinkles (though the colors don’t hold up well once baked), and Watkins.
In 2020, when we couldn’t go to grocery stores that often, I ended up making my own vegan sprinkles for this recipe. There is a great recipe for this found on Gretchen’s Vegan Bakery. We absolutely loved it. It’s just water or aquafaba and powdered sugar. They turn out beautiful, but they are a lot of extra work. If you really want to go a super plant-based route, though, then go for it!
How to make vegan funfetti cake (overview)
For the full written instructions and ingredient measurements, see the bottom of this post in the recipe card. You can also hit the “jump to recipe” button at the top of this post! Here, we’ll go over a brief overview of the steps, along with providing visuals for a better understanding of the recipe.
The cake:
Now let’s talk about the process.
Here are some tips on making the cake batter:
- Whisk the dry ingredients. Be sure to use a whisk here, as this will ensure that the leavening agents are evenly distributed throughout the flour.
- Use room temperature ingredients. When adding in the wet ingredients, make sure that they are room temperature. Room temperature wet ingredients will make sure that your vegan cake doesn’t turn out gummy!
- Don’t over mix the batter! Once all the wet ingredients are combined into the wet, add in the sprinkles and gently fold together just enough to evenly distribute.
- Add in the sprinkles last. Especially if you’re making homemade vegan sprinkles. This will make sure that the sprinkles don’t start to run their color into the batter before it’s even in the oven!
- You can use a stand mixer or mix by hand. Either or works! I have directions for both down below.
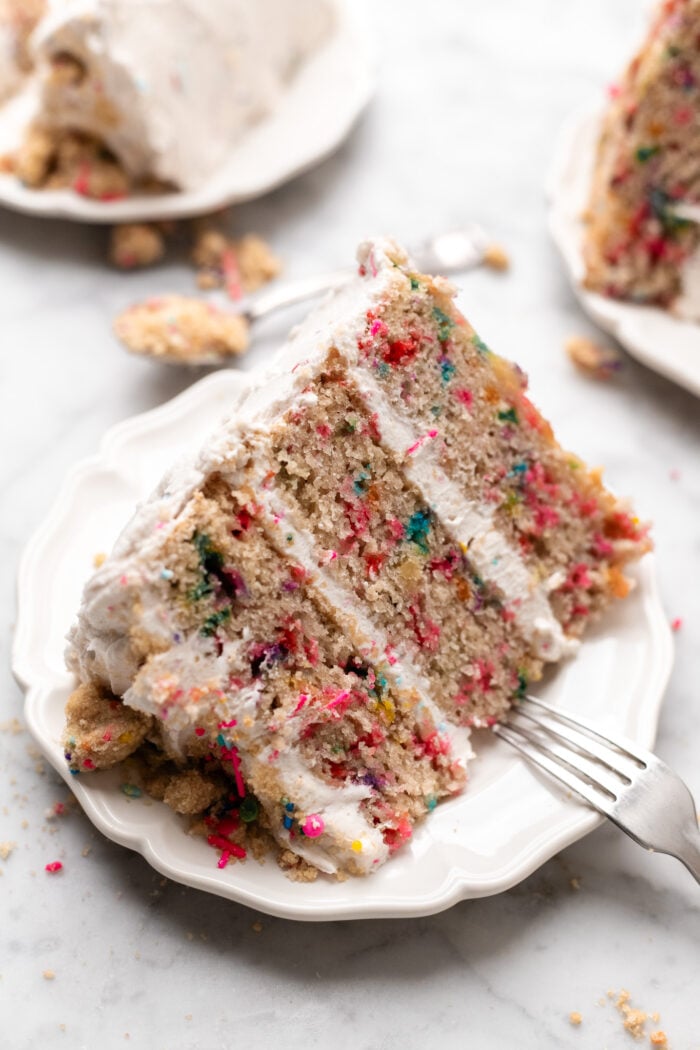
- You can make a two or three-tiered 8″ cake or a three-tiered 6″ cake. The photos of the cake shown here are a three tiered 8″ cake. Each cake layer is approximately 1″ tall. If making a three-tiered 6″ cake, the layers tend to be 1 1/2-1 3/4″ tall.


The Vegan Cream Cheese Frosting
Making an American vegan buttercream frosting or a vegan cream cheese frosting is actually not hard at all. It’s just like making a traditional frosting!
I actually have a whole separate post for how to make vegan buttercream, which is definitely worth a read. You could also do vegan cream cheese frosting, like on my vegan red velvet cake.
To do this, you’ll simply beat the vegan butter (and homemade nut-free vegan cream cheese if you’re making a cream cheese frosting) until whipped.


Then sift in the already sifted powdered sugar into the vegan butter while you beat. You can use a stand mixer for this or a hand mixer. Either works!
Once the buttercream is fluffy, smooth and creamy, frost your vegan funfetti cake!
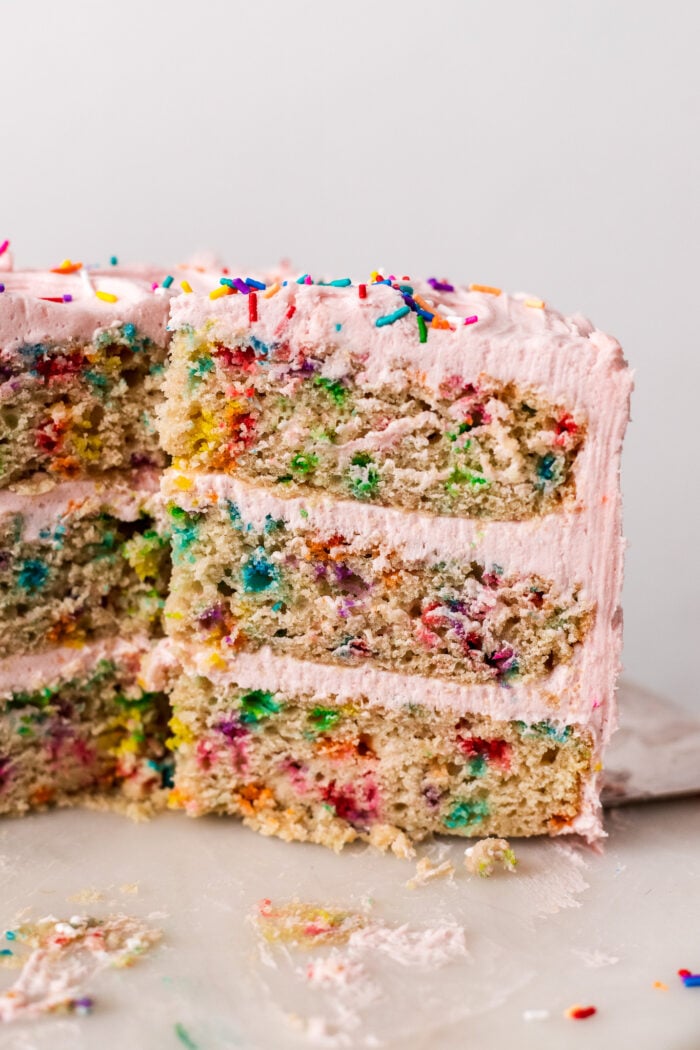
You can reserve some extra frosting if you’d like to do some fun designs, and definitely add some sprinkles on top, as this signals to everyone that this is a rainbow cake (not just your average cake!).

How do I decorate a funfetti cake?
This is my absolute favorite part of any cake process. The decoration part! You should have enough vegan buttercream to even color some of the frosting. But if you’re concerned about not having enough, you can easily make a double batch.
You can use these recommended tools for making a layer cake:
- Cake turntable
- Offset spatula
- Bench scraper
- Parchment paper
But you really just just need a cake stand and some patience. I do love the the offset spatula and the bench scraper, as that helps to achieve a really smooth outside edge. However, you can also do swoops like I did! To do this, simply use the back of a spoon.
You can also use a bench scraper, which creates a really smooth edge. Another idea is to roll the sides in sprinkles all together!
For the middle layers of frosting, I use about 1/2 cup of frosting per layer. That seems generous, but I do love a really frosted cake!
Then I use the remaining frosting to frost the outside of the cake.
The really important item to note about making a layer cake is that you need all layers to be fully cool so that the frosting doesn’t melt. This ensures that your cake layers won’t slip and slide onto the floor!
If you make this recipe, be sure to let me know how it went down below in the comments section, as well as giving it a rating ⭐️⭐️⭐️⭐️⭐️ so that others can see it!
As always, I love to see your beautiful creations on Instagram and Pinterest, so be sure to tag me there!
Happy funfetti baking!
Want to save this recipe for later? Add it to your favorite recipe board on Pinterest!
If you make this recipe, please be sure to leave a comment and a rating ⭐️⭐️⭐️⭐️⭐️ below. This helps others to find the recipes! As always, I absolutely love to see your beautiful creations on Instagram and Pinterest, so be sure to tag me there as well!
Print
One Bowl EASY Vegan Funfetti Cake – Better Than Box Mix!
- Prep Time: 10
- Cook Time: 30
- Total Time: 40 minutes
- Yield: 16–18 1x
- Category: Cake
- Method: Baking
- Cuisine: American
- Diet: Vegan
Description
This vegan funfetti cake is somehow as easy as box mix yet tastes even better?! With a super moist, tender, and “buttery” sweet crumb full of rainbow sprinkles, and absolutely NO eggs nor dairy, every bite of this cake is pure rainbow nostalgia!
Ingredients
- 1 1/4 cup (360 mL) vegan buttermilk, room temperature
- 1 3/4 cup (360 g) granulated sugar
- 3/4 cup (185 g) salted vegan butter (I recommend Miyoko’s or Flora Plant butter), melted and cooled to room temperature
- 3/4 cup (180 g) dairy free yogurt, room temperature
- 1 tbsp vanilla extract
- 3 3/4 cups (450 g) all-purpose flour (or gluten free 1:1 baking flour + 1 tbsp arrowroot or cornstarch)
- 3 tsp baking powder
- 1 tsp baking soda
- 1/3 tsp sea salt
- 1/2 cup (55 g) vegan sprinkles*
- 1 batch vegan cream cheese frosting or vegan buttercream frosting
Instructions
- Please read through all instructions before beginning.
- Prep: Preheat the oven to 350 F. Grease two-three 8″ cake pans with cooking oil, and line them with parchment paper. Set aside. You can also use 9″ if desired. Just be aware that the cakes will bake differently (if you’re doing two 9″ cakes, it will bake shorter). Measure out all ingredients.
- Make the vegan buttermilk: Prepare the vegan buttermilk. Combine the dairy free milk with the apple cider vinegar, and set aside to sit for 5-6 minutes. You can weigh and measure the remaining ingredients during this time.
- Make the batter: In a large bowl, whisk together the melted vegan butter, sugar, dairy free yogurt, vanilla extract, and sea salt. Add in the flour, baking powder, and baking soda, and slowly pour in the vegan buttermilk as you whisk the flour JUST until incorporated. Be sure not to over-mix. Then add in the sprinkles, and gently fold them into the batter with a silicone spatula, being careful if your sprinkle bland is prone to have the colors run.
- Bake: Divide the batter between the cake pans evenly, and bake. For three 8″ layers, bake for 27-30 minutes, or until the toothpick comes out clean. For two 8″ cake layers, bake for 40-42 minutes, or until a toothpick comes out clean.
- Cool: Remove from the oven and allow the cakes to cool in their pans for 10 minutes, then transfer them to a cooling rack to cool completely. Once cooled completely (there is absolutely no warmth to the touch!), then you can prepare your chocolate buttercream.
- Prepare the frosting: make the vegan buttercream or vegan cream cheese frosting according to the directions in the post. Add in vegan food coloring if desired.
- Assemble the cake: on a cake stand or a cake turntable, spoon about 1/3-1/2 cup of frosting onto the first layer. Use an offset spatula to smooth the frosting to the edges. Then place the second layer on top and repeat. Place the third layer on top and frost the outside of the cake, creating a crumb coat. You can either smooth the edges even more after chilling the crumb coat layer, or you can make swoops in the frosting. Decorate with sprinkles and serve! Enjoy!
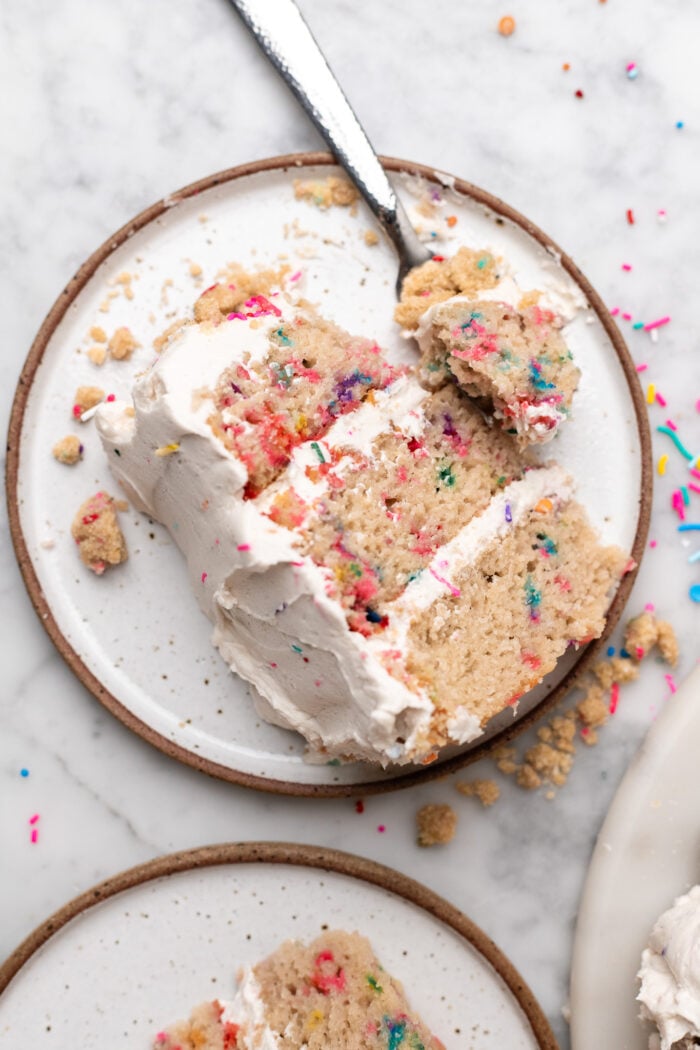
- Storage: store any leftover cake wrapped in parchment paper and tinfoil, and in the fridge for up to 4 days or the freezer for up to 3 months.
Notes
Vegan sprinkles: I used Sweetapolita vegan rainbow cake sprinkles here. Another great brand is Fancy Sprinkles; both have wonderful vegan options. See my blog post for full recommendations.
Gluten free: I recommend using King Arthur’s Measure for Measure gluten free flour.
Nut-free: use all nut-free vegan products for an entirely nut-free cake!


This actually tasted like funfetti cake and it was so easy to make. I used oat milk instead of coconut milk because I don’t like the coconut taste. Worked amazingly. Will be making again!!
AW so happy to hear it!! Oat milk is a good call 🙂 Enjoy!!
We loved this recipe. Made if for my boyfriend’s birthday, and his entire family didn’t believe me when I said it was vegan. I can’t wait for my birthday now!! I want this cake again!!!
That’s wonderful to hear!! Enjoy 🙂 Thank you for the review!
If I wanted to make three 8-inch layers, would it be more effective (to still get a good height) to use three pans for the measurements given or to make an extra half recipe for a third layer? Thanks so much!
Hi Jillian! If you want the three layers to be as thick as the 6″ cake, as pictured, then you can use this recipe 1.5x. Or, you can use three 8″ cake pans and the recipe as is, and apply a thicker layer of frosting in between the layers!
Hi, I’d like to make this cake for my son’s first birthday, he can’t have dairy, plus we have many vegans in the family so it looks perfect! Do you think it would be ok if I used less sugar than suggested? Would I need to change anything?
Hi Rebecca! Aw that’s wonderful, happy first birthday to your son! So I hesitate to reduce the sugar by much, as it needs to be creamed into the vegan butter, and that’s what gives the cake part of its rise. You CAN reduce the sugar by up to 25%, and the recipe should still work just fine! I also have an oat flour vegan GF cake that’s a bit simpler in ingredients (and uses coconut sugar!). I’ve had several readers adjust it for a true smash cake and said it works great! You can add the sprinkles to that one as welL 🙂 Here’s the link: https://thebananadiaries.com/vanilla-vegan-gluten-free-cake-oat-flour/
Enjoy!
could I also use margarine instead of vegan butter?
Hi Grace! I haven’t tested this recipe with margarine (nor have I used margarine in baking even before I was vegan!) so I can’t speak to how it would come out. I’m so sorry!
Hi, I can’t see the US measurements on the site , can you send me the US measurements recipe ? Thank you! I made your pumpkin spice vegan cake and it was amazing
Hi Kate! So sorry for that inconvenience! If you click the “US” tab right above the ingredients section in the same square, you’ll be able to toggle between US and M measurements 🙂
This cake has such nice flavour. I was pleasantly surprised. It’s the first vegan cake that I’ve made and it was delicious. I also made it gluten free. Turned out really well!
This cake was DELICIOUS! I made it for my son’s 12th birthday and we all gobbled it up. Even as leftovers it was super moist and delicious. I will definitely be making this again!
Aw I’m so happy to hear it!! Thank you for the review, and happy belated birthday to your son! 🙂 Enjoy!
Hello! I was wondering if I could substitute applesauce for eggs. I am only dairy free and do not have applesauce on hand! Thanks.
Hi Steph! You can also substitute in an equal amount of dairy free yogurt for the applesauce if you have that. I don’t bake with eggs, so I can’t guarantee it would 100% come out as intended; that being said, generally speaking, 1 egg = 1/3 cup applesauce if you want to try to swap that in!
I just finished baking these. They came out gorgeous.
I used gluten free pastry flour.
I made them into cupcakes – my daughter’s request, her birthday is tomorrow.
So happy the cupcakes didn’t fall.
Super fluffy, nice and puffy!
Thank you for the wonderful recipe.
Hi hi hi! I’m thinking of giving this a whirl for a birthday tomorrow, but I don’t have 3 6″ cake pans….I do have a couple of 8″ pans, though, so I think I could do a 2-layer cake. How should I adjust the cooking time??
Hi Laura! You could absolutely do two 8″ cake layer pans- the timing will be probably around 30-33 minutes. I would start checking their doneness around 27 minutes to see how they’re doing just by turning on the oven light!
WAIT! I missed that you have already commented on this in the recipe. My mistake! Cook longer. Gotcha.
Hi, I’m looking at “US” measurements but some of the recipe is still in “grams” – am I doing something wrong? I’d love to make this cake! Thanks
Hi Jo! I just fixed it so that it should show you both the US and metric at the same time 🙂 Enjoy the cake!
Can you sub sugar for anything?
Hi Nina! The only thing that would really work here is subbing coconut sugar, but it will make the cake tan in color- which isn’t a bad thing but it might be hard to see the sprinkles depending on what brand you’re using. Some people have tried granulated sugar free sweeteners, but I haven’t found much success with them (I think they make the cake a bit gummy in my opinion!).
Hello! Have you ever made this into cake balls? I’ve been wanting to try to make cake balls and have been looking for a recipe! Every recipe of yours I have tried has been amazing!
Hi Brooke! Oh my goodness you’re so sweet, thank you! And yes you absolutely can 🙂 I have with this cake, and it works!! You can check out my recipe for it here: https://thebananadiaries.com/vegan-birthday-cake-truffles/ Enjoy!!
I would love to make this recipe but I only have 2 6” cake pans, how can I adjust it?
Hi Carmen! Not a problem! I reduced the recipe for you 🙂 Here’s what you need:
*Original recipe multiplied by 0.67
*Recipe rounded to nearest cooking fraction
3/4 cup (200 mL) vegan buttermilk
2 1/2 cup (300 g) all-purpose flour (or gluten free 1:1 baking flour + 1 tbsp arrowroot or cornstarch)
1 1/3 tsp baking powder
2/3 tsp baking soda
1 1/8 cup (235 g) granulated sugar
2/3 cup (148 g) salted vegan butter (I recommend Miyoko’s or Flora Plant butter), room temperature
2/3 cup (160 g) unsweetened applesauce or dairy free yogurt, room temperature*
1 tbsp vanilla extract
Optional (but recommended): 1/4 tsp vanilla powder
2/3 cup vegan sprinkles or homemade vegan sprinkles (see notes for recommendations)
1 1/3 batches of vegan buttercream frosting (depending on if you want more frosting to decorate the outside of the cake with)
More sprinkles to decorate
Enjoy!
Thank you soooo much!
Of course!! Enjoy!!
Hi! Thank you so much for the recipe modification for those of us with only two 6″ cake pans. I have made your vanilla sheet cake (13″ x 18″ pan) and then punched out 6″ circles from that to make a layer cake. Obviously this has some different ingredients, but the milk/sugar/flour amounts were fairly similar. Do you think this cake could be baked as a sheet cake using those baking times/temperature as a starting point? Thanks!
You could absolutely bake this as a sheet cake using the same temperature! It will probably bake longer, closer to 40-45 minutes, but check on it with the oven light around the 35 minute mark to gage how it’s doing!
Thank you! 🙏🏼
Planning to make this cake for someones birthday but wondering if it would be okay to make and assemble and store for a day or two in the fridge or if it would be better to make it and/or assemble it the same day we plan on eating it?
Hi Em! Absolutely! I would frost it entirely before you put it in the fridge- frosting acts as a good barrier between the cold air and the cake, keeping it moist. You could even frost it, chill it in the fridge, then if you’re doing 2 days, you can do a layer of plastic wrap after the frosting has been in the fridge for about 30 minutes.
Thinking about giving this a shot! What yogurt do you recommended? And do you have a milk preference for both the cake and buttercream?
Oh wonderful! I use Forager Project, either their unsweetened plain or unsweetened vanilla will work! And I love either soy milk or oat milk, but almond milk works great too!
Help! About to make it. Is the butter melted? The online version says melted at room temp but when I print, it doesn’t say melted. The print version also says 1 cup, but online says 3/4! SOS!!! Thank you!
Hi Teresa! I’m so sorry the printed version isn’t working correctly- that’s so weird! Follow the online version- I’m going to look into the printed version now and see why the coding is askew. Melted 3/4 cup is correct!
Thank you so much for the quick reply!! Lifesaver!! The print version also says “2 TBSP of vanilla (yes, 2 tablespoons)” and online it says 1. And it says yogurt or applesauce… I’m going to follow the online one unless I hear differently from you, but I wanted to let you know!!
Follow the online version for now, I’m so sorry for this confusion!! On my end when I go to print it it’s showing correctly now, when you get a chance just hit refresh and see what happens! But for certainty in the moment, the online version is correct 🙂
Hi Britt! I am a big fan and have made quite a few of your delicious recipes in the past. I am planning on making a Peppa Pig cake for my daughter’s 3rd birthday. I’m thinking of using this recipe as a sheet cake and stacking two of them (and cutting Peppa’s head shape out lol). My question is do you think this recipe will hold up as a stacked sheet cake? Thank you 🙏
Aw thank you so much for the kind words! And that sounds wonderful!! Yes you absolutely can make this as a stacked sheet cake- I would double the recipe, but bake it in its normal volume per sheet cake layer (9×13). Or you can use the recipe as is and simply slice the single sheet cake layer in half! It will probably bake around 35 minutes for a sheet cake- just check how it’s doing around the 30 min mark with the oven light 🙂 Enjoy!!
Is it ok to use organic cane sugar? If made into cupcakes, do you have a recommended cook temp and time? Thank you!
Yes, that’s what I use!! As it’s vegan 🙂 But for cupcakes, I’d actually just recommend you use this recipe- it’s specifically adapted from the funfetti cake, but to give you the perfect amount of cupcakes (and bake time!) 🙂 Enjoy!! https://thebananadiaries.com/vegan-funfetti-cupcakes/
Awesome thanks so much!
Can you provide exact measurements for butter milk plz!
Hi Radmila! The recipe is linked there in the recipe card 🙂 But you will need 345 mL dairy free milk with 1 tbsp (15 mL) apple cider vinegar!
Hi. I was wondering if you could help me figure out what I did wrong. My batter had the texture of a thick paste. I only substituted coconut sugar nothing else. I baked it and it was dry but did taste good. Thank you for your time and recipe
Hi Gabe! It sounds like you scooped too much flour- did you use the US cup measurements or scale? When using cup measurements, often people will accidentally scoop the flour rather than spoon and leveling, resulting in way more flour than necessary, and a super dry cake. I would recommend either using a scale or spoon and leveling the flour- and make sure not to pack it down!
hi – just made this and it’s amazing. how do you recommend to best defrost it? i wanted to test it out gluten free for my friends upcoming birthday and of course it’s perfect so hoping to save a layer for when i assemble it all this weekend. thank you!
Hi Sophie! SO glad you loved it! To defrost, simply allow the cake slices to come to room temperature for about 1 hour. 🙂 Enjoy
Hello! This looks so beautiful, and I LOVED your cookie dough cake 🙂 I saw in the blog post you said that you recommend cake flour, but in the recipe it says APF. If I use cake flour, does anything in the recipe card need to be adjusted? Sorry if that’s a silly question, I don’t know much about the science of baking. Thank you for your help!!
Hi Emily! Thanks for the question! No need to make any other adjustments in the recipe. 🙂
hello! love your recipes! starting this recipe now. In the description it says 2 TBSP vanilla but recipe card says 1 TBSP. Just confirming 2 TBSP is the correct amount? thank you so much !
Hi Monica! Sorry for the confusion! We have actually updated the recipe so you’ll only need 1 tablespoon! 🙂
Hi! Can I make this with cake flour? If so, do I need to change anything? Or should I just stick with regular flour? Thanks!
No problem!! You actually don’t need to change anything- I know most will say you need to adjust the gram measurements, but I’ve found using the same gram measurements of cake flour to ap flour works just fine.
Hi there! So I am not vegan and wondering if I can just use regular 2 percent milk and buttermilk? Also can I use Greek yogurt instead? Thank you! Excited to make!
Hi Jiya! Unfortunately I can’t say as this recipe hasn’t been tested with non vegan ingredients! So sorry!
absolutely fantastic recipe! everybody enjoyed it so much and most people at the party were not vegan. super moist and delicious. my sprinkles unfortunately ended up dissolving in the cake, but it didn’t really matter!
This is just beautiful 🙂 Thanks ou so much for the review!! Making me smile ear to ear! also LOVE the frosting color!! Which sprinkles did you use? Some brands will do that!
Hello! I have loved all of your recipes that I have made and am so excited to try this one! I have two 9 inch cake pans. How would you suggest adjusting the baking time based on this? Thank you!!
Oh my goodness- this is the sweetest!! Thank you so much for the kind words!! That’s totally doable for the 9″ cake pans- they’ll probably bake around 35-37 minutes, because when I make this as a two layer 8″ cake, those ones have baked for 40-42 minutes! But check with the oven light first and then with a toothpick to ensure they’re baked properly!